Best Cement Adhesive for Marble Recommended by Contractors and Installers
Ask an experienced marble contractor about adhesive failure and you'll usually hear the same story: it's almost never the marble that fails first. It's the bond underneath it — especially outdoors, where rain, sun, and temperature swings put a cement adhesive through stress an interior installation never sees. Slabs that looked perfectly fixed on installation day start drumming hollow, then lifting, within a season or two.
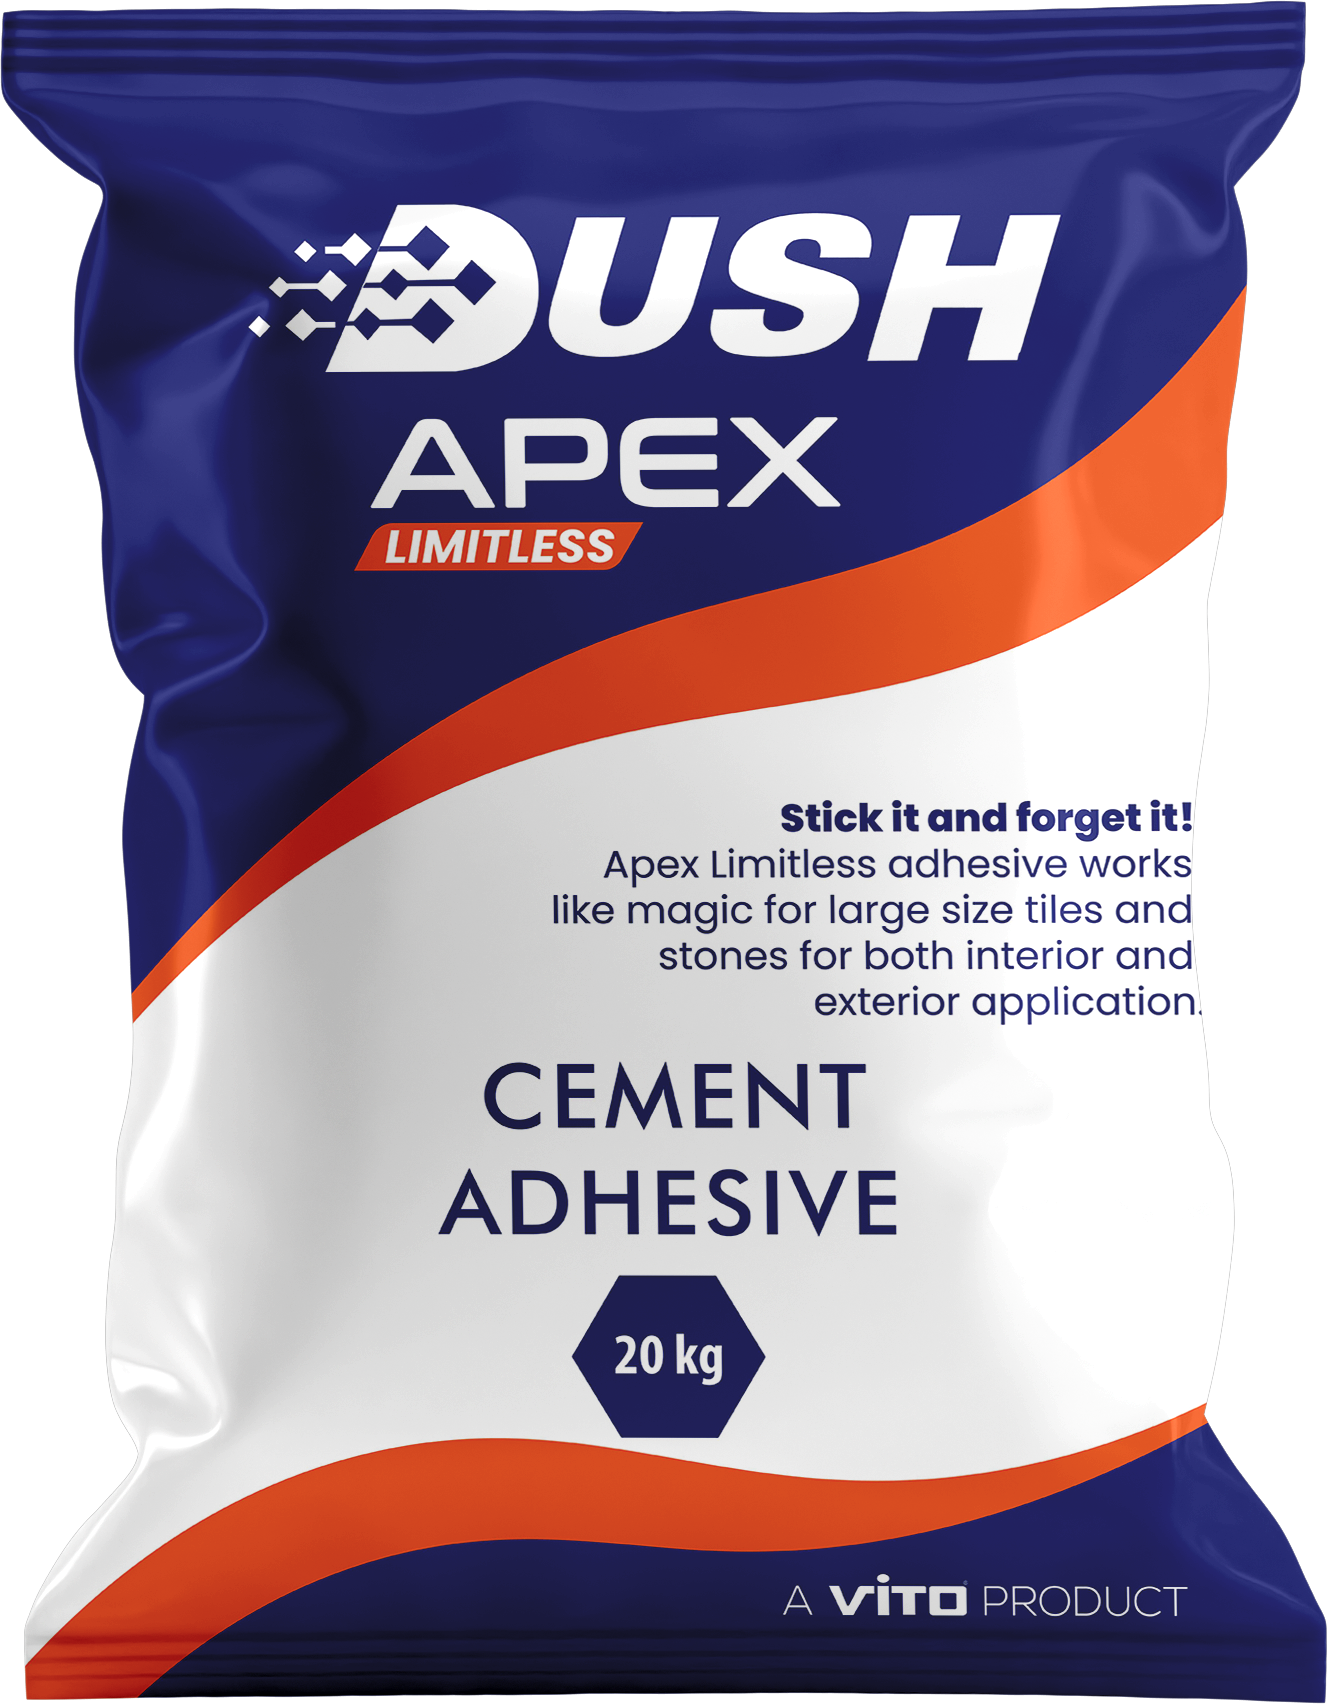
This guide is written the way we'd actually explain the problem to a site supervisor or a homeowner working with a contractor: what adhesive classification numbers actually mean, why exterior marble fails on a completely different timeline than interior marble, how to diagnose a bond that's already going wrong, and why DUSH APEX — a professional-grade white cement adhesive from DUSH, an Italian stone-care brand — is the product we see specified repeatedly by contractors and tiling companies working on exterior stone.
Understanding Cement-Based Marble Adhesives: A Quick Primer
Before comparing products, it helps to understand what's actually inside a bag of "marble adhesive," because not all of them are built the same way, and the differences aren't always visible on the packaging.
Cement-based tile and stone adhesives are broadly classified by their bond strength and behaviour, most commonly using categories derived from international standards such as EN 12004 and the Indian equivalent, IS 15477. Two letters do most of the work in these classifications:
- C1 vs. C2 (bond strength class). C1 is the basic classification — an adhesive that meets the minimum tensile adhesion strength required to be called a "cement adhesive" at all. C2 is the improved classification, requiring meaningfully higher bond strength, and is the grade generally specified for large-format slabs, natural stone, and any exterior or heavy-duty application.
- S1 / S2 (deformability, where applicable). Some adhesives are also rated for flexibility — how much movement the bond can absorb without cracking, which matters on substrates that flex or expand and contract, such as exterior walls under thermal cycling.
A powder adhesive that simply says "cement-based tile adhesive" on the bag, with no classification stated at all, is very often a basic C1-grade product — perfectly serviceable for small interior ceramic tiles, but not engineered for the specific demands of natural stone, large-format slabs, or exterior exposure. This is the single most common mismatch we see on failed exterior marble jobs: a contractor or supplier substituting a general-purpose tile adhesive for a job that actually required a stone-specific, exterior-rated, C2-class product.
Why Exterior Marble Adhesive Fails Faster Than Interior
Indoors, a cement adhesive bond sits in a stable environment for its entire life — consistent temperature, no direct rain, no UV. Outdoors, that same bond faces three stresses simultaneously, every single day, for years:
- Thermal expansion and contraction. Marble and the substrate beneath it expand and contract at different rates as temperatures swing through the day. Over thousands of cycles, this repeated micro-movement fatigues a bond that isn't formulated to flex slightly with it, eventually opening hairline separations that widen over time.
- Moisture infiltration. Rain works its way behind poorly rated adhesives — particularly through joints, edges, and any micro-cracking already caused by thermal cycling — washing out bond strength from underneath before any visible sign of failure appears on the surface. By the time a slab sounds hollow when tapped, the moisture damage underneath it has usually been building for months.
- UV degradation. Continuous sun exposure breaks down the polymer content in adhesives that weren't formulated to handle it, weakening the bond gradually. This is a slower process than moisture damage, but it compounds with it — a UV-weakened bond fails faster once moisture starts working on it too.
A standard interior-grade tile adhesive was never tested against this combination. That's why the failure pattern contractors describe is so consistent: it isn't sudden. It's marble that "used to be fine" slowly starting to drum hollow, then lift — usually discovered only when a slab finally comes loose, at which point the fix is a full re-installation rather than a small repair.
The other failure mode worth knowing: grey-cement bleed. On white or light-coloured marble, a standard grey cement adhesive can bleed through hairline joints and stain the stone face over time — a cosmetic failure that's just as visible as a structural one, and one that's completely avoidable by specifying a white cement formula from the start rather than trying to clean it out afterward.
Signs Your Existing Marble Installation Has a Failing Bond
If you're inspecting marble that's already installed — your own property, or a site you're assessing as a contractor — these are the early warning signs worth checking before a slab actually comes loose:
- Hollow sound when tapped. Gently tap the slab with a coin or the handle of a small tool. A solid, consistent sound across the slab means good contact with the adhesive bed. A hollow or drumming sound in one area, especially near an edge or corner, usually means the bond has already started separating there.
- Visible lippage. If adjacent slab edges are no longer level with each other, the adhesive bed thickness was inconsistent at installation, or has settled unevenly since — both are signs of a lower-grade adhesive without lippage control.
- Hairline cracking along joints. Small cracks tracking along grout lines, particularly on exterior installations, often indicate the adhesive bed is being stressed by thermal movement it wasn't designed to absorb.
- Discolouration at joint edges. A greyish tint bleeding from the joints into the stone face, especially on white or pale marble, points to a grey-cement adhesive that wasn't matched to a light-coloured stone.
- Any movement underfoot or when pressed by hand. This is the most advanced stage — the slab is no longer meaningfully bonded and needs to be lifted and re-set before it becomes a safety hazard, particularly on stair treads or high-traffic exterior flooring.
Catching the first two signs early — hollow sound and lippage — is far cheaper to address than waiting for full slab detachment, since it usually means re-bedding a small area rather than a full re-installation.
What Is DUSH APEX?
DUSH APEX is a professional-grade white cement adhesive from DUSH, an Italian stone-care brand, formulated specifically for marble and natural stone in exterior environments. It's built to resist temperature extremes, moisture, and UV exposure — the exact combination that causes standard adhesives to lose grip outdoors — which is why it's become the specification contractors reach for on outdoor facades, courtyards, and exterior staircases.
Why it works where standard adhesive doesn't
- Weather-resistant bond — formulated to withstand rain, UV radiation, and temperature cycling without losing grip.
- Premium white cement base — keeps joints bright and prevents the grey-bleed staining that darkens marble edges over time.
- High bond strength — exceeds standard pull-out requirements for outdoor cladding, flooring, and feature walls.
- Wide substrate compatibility — bonds to concrete, brick, block, and render, covering the substrates most common in exterior construction.
The Science Behind the Bond, in Plain Terms
Without getting into proprietary formulation detail, it's worth understanding broadly why a polymer-modified, purpose-built adhesive outperforms a basic cement mix, because it explains every practical benefit listed above.
Plain cement-and-sand mixes bond by mechanical interlock and hydration chemistry alone — they harden, and the hardened matrix physically grips the substrate and the tile. This works, but the resulting bond is rigid and brittle: it has very little ability to absorb movement, and once it's stressed past its limit, it cracks rather than flexing.
A polymer-modified adhesive like DUSH APEX has polymer additives blended into the cement base. These polymers do two things that plain cement can't: they improve adhesion at a molecular level to a wider range of substrates (which is why it bonds reliably to concrete, brick, block, and render rather than just one or two of them), and they add a degree of flexibility to the cured bond, letting it absorb some of the thermal expansion and contraction movement instead of cracking under it immediately. This is also the mechanism behind wet-area suitability — the same polymer modification that adds flexibility also reduces water absorption into the adhesive layer itself, which matters both outdoors under rain and indoors in bathrooms.
How to Apply DUSH APEX
Prepare the Substrate
Ensure the surface is clean, structurally sound, and free of dust, oil, or loose material. Dampen porous substrates before applying.
Mix
Combine the powder with water at the ratio on the label. Mix to a smooth, uniform paste and let it slake for 5 minutes.
Apply & Bond
Apply with a notched trowel, press the marble firmly, check alignment, and protect from rain for the first 24 hours of curing.
A closer look at each stage
Substrate preparation is where most avoidable failures begin. Any dust, oil, curing compound residue, or loose material on the substrate becomes a weak layer between the substrate and the adhesive — the adhesive can bond perfectly to itself and still fail, because it never actually gripped the substrate underneath the contamination. On porous substrates like concrete block or render, dampening (not soaking) the surface before application stops the substrate from pulling water out of the fresh adhesive too quickly, which would otherwise starve the cement hydration process and weaken the cured bond.
Mixing deserves more care than it usually gets on-site. Adding water by eye, mixing too briefly, or skipping the slaking rest period (letting the mixed paste sit for around five minutes before a final re-mix) all leave lumps or inconsistent hydration in the mix, which shows up later as weak spots in the cured bed. Always mix with clean water only — construction site water contaminated with other chemicals, or "improving" the mix with extra cement powder or unspecified additives, both compromise the tested performance of the formula.
Application and bonding is where trowel notch size and back-buttering technique matter most. The notch size on the trowel needs to match the slab size and weight — too small a notch and there isn't enough adhesive bed to achieve full contact coverage under a large, heavy marble slab, which is exactly how you get the hollow spots described earlier. Back-buttering (applying a thin coat of adhesive to the back of the slab itself, in addition to the substrate) is standard practice for large-format marble specifically because it eliminates air voids that a trowel-only application on the substrate side can leave behind, especially if the slab itself has a slightly uneven back face.
Do this, not that
Do this
- Back-butter large marble slabs for full contact coverage
- Check substrate flatness with a straight edge before starting
- Mix with clean water only, unless additives are specified
- Leave at least a 3mm joint around room/area perimeters for expansion
- Store unopened bags in a cool, dry place off the floor
Avoid this
- Applying adhesive to a substrate with standing water or visible dampness
- Using a trowel notch too small for the slab size
- Setting marble into adhesive that has already begun to skin over
- Letting adhesive freeze on the substrate or slab during curing
- Ignoring the open time — always work within the declared window
Choosing the Right Adhesive: A Decision Framework
Not every marble installation needs the same adhesive, and specifying the wrong grade in either direction wastes money — either on a premium product for a job that didn't need it, or, far more commonly, on a basic product for a job that needed better protection. Work through these questions before selecting a product:
- Is the installation interior or exterior? Exterior installations should default to a weather-resistant, C2-class, exterior-rated product like DUSH APEX. Interior installations in stable, climate-controlled spaces can often use a lighter-duty adhesive, though large-format slabs still benefit from C2-class bond strength regardless of location.
- What size and weight are the slabs? Larger, heavier natural stone slabs need higher bond strength and back-buttering technique regardless of location — a small ceramic tile and a large marble slab are not interchangeable use cases for the same basic adhesive.
- Is the area ever wet — a bathroom, pool surround, or exterior exposed to rain? This calls for a polymer-modified, wet-area-suitable adhesive, since standard adhesives lose bond strength when exposed to sustained moisture.
- What substrate is the marble going onto? Confirm the adhesive is rated for that specific substrate — concrete, brick, block, and render each behave slightly differently, and not every adhesive is validated across all of them.
- Is the marble light-coloured or white? Always specify a white cement formula for pale stone to avoid grey bleed at the joints, regardless of what other performance requirements apply.
- How much time does the crew need to position each slab? A longer open time (20–30 minutes, versus 10–15 for basic products) gives installers room to properly align and level large or awkward slabs without racing the adhesive as it starts to skin over.
Run through this checklist honestly, and in most real-world Indian construction contexts — especially anything exterior, anything large-format, or anything using light-coloured marble — the answer points toward a professional-grade, exterior-rated, white cement adhesive rather than a basic interior tile adhesive.
DUSH Professional Grade vs. Standard Cement Adhesive
| Feature | Standard Adhesive | DUSH APEX (Professional Grade) |
|---|---|---|
| Bond strength | Basic C1 grade — minimum standard only | C2 class — exceeds IS 15477 requirements |
| Coverage | 3–4 sq.m/kg, variable quality | 4–5 sq.m/kg with consistent bed depth |
| Open time | 10–15 minutes — rushed application | 20–30 minutes — allows precise positioning |
| Lippage control | None — prone to uneven slab height | Anti-sag formula prevents height variation |
| Wet-area suitability | Not suitable for permanently wet areas | Polymer-modified — suitable for bathrooms |
| Shelf life | 6–9 months | 12 months in sealed bag, dry storage |
| Technical support | None | Full DUSH technical team available |
The gap between these two columns isn't marketing exaggeration — it maps directly onto the failure modes described earlier in this guide. Higher bond strength addresses thermal-cycling fatigue. Longer open time reduces the rushed, uneven application that causes lippage and hollow spots. Wet-area suitability addresses moisture infiltration. Each line in this table is a specific answer to a specific way exterior marble adhesive actually fails on real jobs, not just a longer feature list.
Where DUSH APEX Is Used
Exterior Facades
Marble cladding exposed to full weather.
Outdoor Courtyards
Flooring under direct rain and sun exposure.
Garden Feature Walls
Decorative stone facing outdoors.
Exterior Staircases
High-traffic surfaces under weather stress.
Pool Surrounds
Constant moisture and sun exposure.
Commercial Exteriors
Long-term outdoor stone installations.
Re-Fixing a Failed Exterior Marble Staircase
A common scenario contractors describe: an exterior marble staircase, installed two to three years earlier with a general-purpose tile adhesive, begins showing hollow-sounding treads and visible lippage at the nosing edges — exactly the pattern this guide describes as early bond failure. Left alone through another monsoon season, one or two treads eventually detach fully, creating a genuine safety hazard on a staircase that sees daily foot traffic in all weather.
The standard remediation approach is to lift the affected slabs, fully remove the old adhesive residue from both the substrate and the underside of the marble, confirm the substrate is sound and dry, and re-set the treads using a white, C2-class, exterior-rated adhesive applied with back-buttering technique on each slab. Because the new bond is formulated for thermal cycling and moisture rather than adapted from an interior product, the expectation going into a second monsoon season is a stable, silent-sounding tread rather than a repeat of the original failure.
This reflects a typical remediation scenario for this type of failure rather than a specific verified project. Actual diagnosis, scope, and outcome depend on the extent of damage, substrate condition, and site access — a site assessment is the only reliable way to confirm the right approach for a specific staircase or installation.
Common Myths About Marble Adhesive
- "Any white glue-like adhesive will do for marble." Colour alone doesn't indicate performance grade — a white-coloured adhesive can still be a basic C1 product with no exterior rating. Check the classification, not just the colour.
- "More adhesive means a stronger bond." Over-application, especially without proper trowelling technique, traps air and moisture rather than improving strength. Correct notch size and back-buttering matter more than sheer quantity.
- "If it worked fine indoors, it'll work fine outdoors." This is the single most common and costly assumption behind failed exterior installations, precisely because interior and exterior bonds face entirely different stress profiles, as covered earlier in this guide.
- "Adhesive failure is always caused by bad workmanship." Skilled installation with the wrong-grade adhesive will still fail on schedule — technique can't compensate for a product that isn't rated for the job's actual conditions.
- "Cement adhesive doesn't need curing time before load — it's basically set once it's hard to the touch." Handling strength at 24 hours is not the same as full cure at 7–28 days; loading a fresh installation too early is a common cause of early-life bond weakness that isn't visible until later.
After Installation: Basic Maintenance and Inspection
A correctly specified and applied adhesive substantially reduces the risk of bond failure, but periodic inspection — especially on exterior installations — catches any developing issue while it's still a minor, low-cost fix rather than a full re-installation. A simple annual check before and after the monsoon season, using the tap-test and visual checks described earlier in this guide, is enough for most residential and light-commercial installations. For high-traffic commercial exteriors, staircases, and pool surrounds, a more frequent inspection schedule is worth building into routine facility maintenance, given the safety implications of a slab failing underfoot.
Glossary of Terms Used in This Guide
- C1 / C2 (bond strength class)
- Classification of a cement adhesive's tensile bond strength under standards such as EN 12004 / IS 15477. C1 is the basic minimum; C2 is the improved, higher-strength grade generally required for natural stone and exterior work.
- Open time
- The window after spreading the adhesive during which a tile or slab can still be pressed in and properly bond. Once this window passes, the adhesive begins to "skin over" and loses its ability to grip.
- Lippage
- A height difference between the edges of two adjacent slabs or tiles, usually caused by inconsistent adhesive bed thickness.
- Back-buttering
- Applying a layer of adhesive to the back of the slab itself, in addition to the substrate, to achieve full contact coverage and eliminate air voids — standard practice for large-format stone.
- Slaking
- A short rest period (typically around five minutes) after initial mixing, before a final re-mix, that allows the cement particles to fully hydrate for a smoother, more consistent paste.
- Polymer-modified
- A cement adhesive with polymer additives blended in to improve flexibility, substrate adhesion, and water resistance compared to a plain cement-and-sand mix.
- Grey bleed
- Discolouration that occurs when a grey cement adhesive stains through the joints or edges of light-coloured or white marble.
Regional Climate Considerations Across India
"Exterior conditions" isn't a single, uniform stress profile across India — the specific combination of heat, humidity, and rainfall an adhesive bond has to survive changes significantly by region, and it's worth thinking through which of these applies to your project.
- Coastal and high-humidity regions. Cities along India's western and eastern coastlines combine near-constant humidity with heavy, sustained monsoon rainfall for months at a time. Here, moisture infiltration is the dominant threat to an adhesive bond — sustained dampness behind the marble for weeks on end, rather than occasional rain exposure. A polymer-modified, low-water-absorption adhesive matters more here than almost anywhere else in the country.
- Hot, dry interior regions. Central and northern regions with intense, dry summer heat put the greatest thermal-cycling stress on a bond — large daily temperature swings between scorching daytime surface temperatures and cooler nights. This is where flexibility and bond strength under thermal fatigue matter most, since the moisture threat is lower but the expansion-contraction cycle is more extreme.
- Northern regions with cold winters. Where temperatures drop toward or below freezing in winter, any moisture that has infiltrated a weak bond can freeze and expand, physically forcing joints apart — a mechanism that compounds ordinary moisture damage into structural cracking far faster than in a region that never sees frost.
- High-altitude and hill regions. Intense UV exposure at altitude, combined with significant day-to-night temperature swings, stresses both the UV-resistance and thermal-flexibility properties of an adhesive simultaneously.
Because most Indian construction projects don't have the luxury of specifying a different adhesive for every micro-condition, the practical takeaway is this: an adhesive engineered to handle all three major stresses at once — moisture, thermal cycling, and UV — rather than optimised narrowly for just one, is the safer default specification almost everywhere in the country, since very few regions experience only a single stress in isolation.
Lifecycle Cost: Why the Cheaper Bag Isn't Always the Cheaper Job
It's easy to compare adhesive products purely on the price per bag, but that number only tells part of the story for any exterior marble installation, and it's worth walking through the fuller cost picture before treating the cheapest option as the most economical one.
A basic, unrated adhesive is genuinely cheaper at the point of purchase. But when that bond fails within one to three years — which is the timeline contractors consistently describe for mismatched exterior adhesive — the actual cost of the job includes far more than the second bag of adhesive needed to redo it: labour to remove the failed slabs, disposal of the old adhesive residue, the marble itself if any slabs crack or chip during removal, and the lost use of the space or structure while the rework is underway. On a staircase, feature wall, or facade, that rework often costs several times more than the adhesive price difference would have been at the outset.
A correctly specified, exterior-rated adhesive costs more per bag, but it's designed to be a one-time installation cost for the life of the marble itself, rather than a recurring expense every time the previous bond fails. For any project where the marble itself represents significant material cost — which describes most exterior marble work — the adhesive underneath it is not the place to economise, since it's protecting an investment many times larger than the adhesive's own price.
Questions worth asking before you buy
Whether you're a contractor specifying a product for a client or a homeowner reviewing what your contractor has proposed, these questions cut through most of the ambiguity around adhesive selection:
- What bond-strength classification does this product carry, and against which standard?
- Is this specific product rated for exterior use, or is it being used outdoors despite being formulated for interior applications?
- What is the declared open time, and does it match how the crew is actually planning to work?
- Is this a white or grey cement base, and does that match the colour of the marble being installed?
- What substrate is this adhesive validated for, and does that match the actual substrate on-site?
- Does the manufacturer offer technical support if something on-site doesn't go to plan?
A supplier or contractor who can answer all six of these clearly and specifically is generally proposing a properly specified product. Vague or evasive answers to any of them are worth treating as a signal to look more closely at what's actually being proposed for the job.
Why Contractors Specify DUSH APEX
A few things explain why this keeps showing up as the professional's choice rather than a homeowner-only product:
- Built for the failure mode contractors actually see. It's engineered around thermal cycling, moisture, and UV — the specific combination that causes exterior bond failure — not adapted from an indoor formula.
- Tested to a recognised classification. DUSH APEX is rated C2 class, exceeding the IS 15477 requirements that standard adhesives only just meet at the basic C1 level.
- Referenced against independent industry bodies. DUSH points to organisations including the Natural Stone Institute, BIS Standards, and ASTM International as reference points for its formulation standards, rather than relying solely on its own marketing claims.
- Backed by an Italian stone-care manufacturing background, with technical support available for contractors working through project-specific questions.
- Consistent results across a crew. A longer, more forgiving open time means the same product performs reliably whether it's being applied by the most experienced installer on-site or a newer team member, which matters on any job with more than one person setting slabs.
Frequently Asked Questions
Why do exterior marble adhesives fail faster than interior ones?
What kind of adhesive should be used for marble exposed to weather?
How long does marble adhesive take to fully cure?
What happens if you use the wrong adhesive for marble?
What's the difference between white and grey cement adhesive for marble?
How much marble adhesive do I need per square metre?
Can this adhesive be used in wet areas like bathrooms?
Is this product safe for use in hospitals and schools?
Can this adhesive be used on humid or damp substrates?
What is the shelf life of this product, and how should it be stored?
How do I dispose of unused adhesive correctly?
Can DUSH APEX be used on granite or other natural stone, not just marble?
Specify the Adhesive Built for Outdoor Marble
Weather-resistant bond, white cement finish, and a C2 rating that exceeds IS 15477 — DUSH APEX is the professional's choice for exterior marble that has to hold up for years, not months.
Product information referenced from the official DUSH APEX product page. General adhesive classification information (C1/C2, EN 12004/IS 15477) is provided as industry background and simplified for a general audience; consult the full standard and the product's technical datasheet for complete specification detail. Always wear protective gloves, work in a well-ventilated area, and patch-test on a small, inconspicuous area before full application. Follow the manufacturer's current mixing, application, and safety guidance on the product label and technical datasheet.