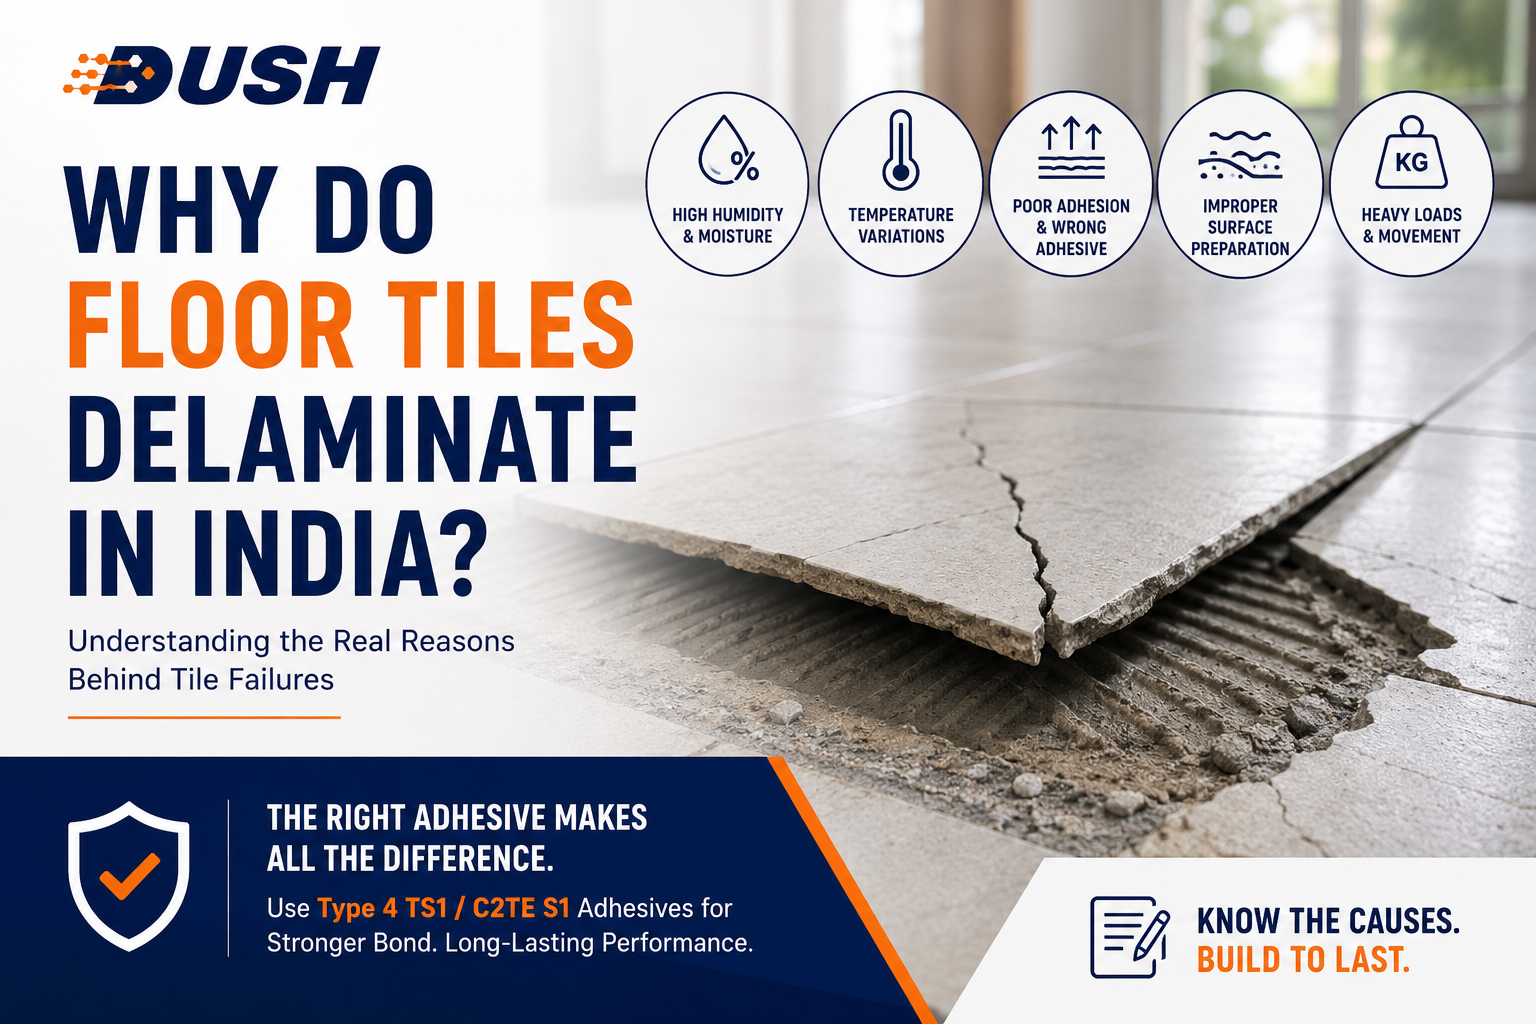
Floor tile delamination — the separation of a tile from its adhesive bed, producing the hollow sound underfoot and eventually the lifted or cracked tile — is one of the most common construction defects in Indian homes and commercial spaces. It is also one of the most preventable. In the vast majority of cases, delamination is not a material failure. It is an installation failure — the wrong adhesive, the wrong preparation, or the wrong application technique producing a bond that was never adequate for the tile and the environment it was placed in.
This guide identifies every cause of floor tile delamination in India, explains the sequence through which bond failure develops, and establishes the correct specification and installation practice that prevents it.
What Is Tile Delamination?
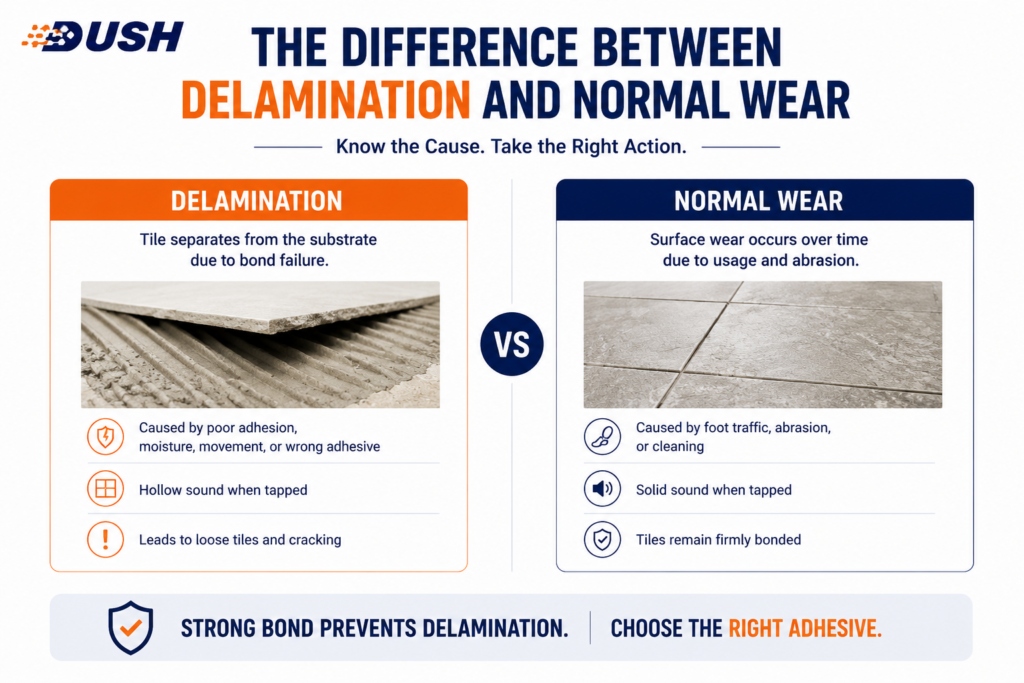
The Difference Between Delamination and Normal Wear
Delamination is the loss of adhesive bond between a tile and the substrate beneath it — the concrete screed, the concrete slab, or the existing substrate surface. It is distinct from tile surface wear, grout deterioration, or tile cracking from impact. A delaminated tile may appear visually intact — no cracks, no chips, no visible damage — while the bond beneath it has failed completely or partially.
The distinction matters because the repair for delamination is fundamentally different from the repair for surface damage. Delaminated tiles must be lifted and re-bonded with correct adhesive — surface polishing or regrouting cannot address a bond that no longer exists.
How to Recognise Delamination Before Tiles Lift
Delamination rarely announces itself with a suddenly lifted tile. It develops progressively, and it announces itself through sound before it becomes visible. The hollow sound produced by tapping a delaminated tile — dull, resonant, distinctly different from the solid sound of a bonded tile — is the diagnostic signal that bond failure has occurred beneath that tile. The hollow section may be localised (a corner or edge) or complete (the full tile area). In both cases, the bond is compromised and the tile will eventually lift under normal floor use — or crack at the hollow edge where mechanical stress concentrates.
The Seven Most Common Causes of Floor Tile Delamination in India
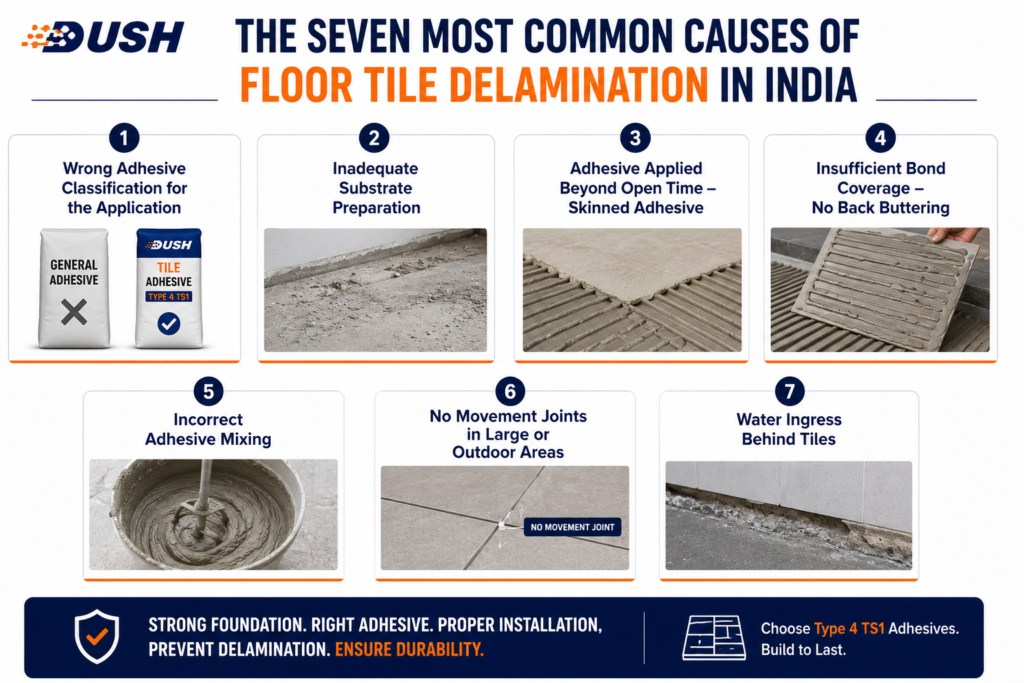
Cause 1 — Wrong Adhesive Classification for the Application
The single most frequent cause of tile delamination in India is using an adhesive that is not rated for the application it is placed in. The most common form of this error is using cement-sand mortar — ordinary Portland cement mixed with coarse sand on site — for applications that require polymer-modified tile adhesive classified IS 15477:2019 Type 4 TS1.
Cement-sand mortar has no classified tensile bond strength. It bonds by mechanical interlocking with no polymer chemistry to supplement the mechanical bond. In wet environments, it absorbs water and progressively weakens. Under thermal cycling in outdoor applications, it cracks without flexibility. For heavy marble slabs, it provides 0.3 to 0.5 N/mm² effective bond strength — against the 1.61 N/mm² independently tested tensile strength of polymer-modified Type 4 TS1 adhesive. This is the bond strength gap that explains why cement mortar floors delaminate within 5 to 10 years while correctly specified polymer-modified installations perform for decades. The full performance comparison between cement mortar, white cement, and polymer-modified adhesive — with the tested numbers behind each option quantifies exactly why this adhesive selection error causes delamination.
Cause 2 — Inadequate Substrate Preparation
The second most common cause is a substrate that was not adequately prepared before adhesive was applied. Delamination from substrate failure takes three forms in Indian construction.
The first is a contaminated substrate — dust, oil, paint, curing compound residue, or existing adhesive on the surface prevents the new adhesive from bonding to the substrate. The adhesive bonds to the contaminant rather than the substrate itself. When the contaminant fails — which it will under load — the tile and adhesive come with it.
The second is an immature concrete substrate — new concrete that has not completed its 28-day curing cycle before tiling began. Concrete continues to shrink as it cures. Tiling on concrete less than 28 days old creates a substrate that is still in dimensional change — the concrete moves beneath the adhesive bed, and a bond that was adequate at day 7 is compromised by day 28 as the concrete completes its shrinkage cycle.
The third is a substrate with hollow sections — delaminated screed, cracked concrete, or voids beneath the existing surface. Tiling over a hollow substrate concentrates mechanical stress at the hollow edges, cracking both the adhesive bond and eventually the tile above it.
Cause 3 — Adhesive Applied Beyond Open Time — Skinned Adhesive
Every tile adhesive has an open time — the period from application to the point where the adhesive surface develops a dry skin and loses its open bonding capacity. For standard Type 1 adhesive, this is 15 to 20 minutes. For polymer-modified Type 4 adhesive like Dush Apex Limitless, the EN 12004 E (extended open time) classification confirms 45 minutes.
When a tile is placed on adhesive that has exceeded its open time — when the surface has skinned over — the tile makes contact with a cured surface rather than an open bonding surface. The tile appears fixed. The adhesive ridges beneath it retain their shape and seem to support the tile. But there is no chemical or mechanical bond at the tile-adhesive interface. The tile is resting on a cured adhesive surface, not bonded to it. Under normal floor loading — particularly impact loading — this apparent bond fails, sometimes within weeks of installation, sometimes within months.
Skinned adhesive is the most insidious delamination cause because it is invisible at the time of installation and produces tiles that initially appear perfectly bonded.
Cause 4 — Insufficient Bond Coverage — No Back Buttering
Adequate bond coverage — the percentage of the tile back surface in contact with adhesive — is the structural foundation of a tile installation. For standard ceramic tiles up to 40×40 cm, 65 to 75% coverage using a 6 mm notched trowel is acceptable. For tiles above 60×60 cm, marble slabs, and heavy stone, 95 to 100% coverage is required — achievable only through a combination of the correct notched trowel on the substrate and back buttering (a skim coat of adhesive on the tile back face) before placement.
When large format tiles or marble slabs are installed without back buttering — with only the substrate-side ridged adhesive — coverage drops to 60 to 70% at best. The uncovered hollow areas beneath the tile concentrate mechanical stress at their edges. Under the sustained load of a marble slab weighing 25 kg per square metre, these hollow areas become the locations where bond failure initiates. The complete guide to back buttering technique and the coverage requirements for every large format tile dimension establishes why 95 to 100% contact is non-negotiable for heavy tiles and why partial coverage inevitably leads to delamination under load.
Cause 5 — Incorrect Adhesive Mixing
Polymer-modified tile adhesive is a precision product — its performance depends on the correct water-to-powder ratio producing the polymer hydration the formulation requires. Two mixing errors are common in Indian construction sites.
The first is excess water — adding more water than the specification requires to produce a more workable mix. Excess water dilutes the polymer concentration in the mix, reduces the density of the polymer network in the cured adhesive, and directly reduces the tensile bond strength below the TS1 classified figure. An adhesive that should deliver 1.61 N/mm² at the correct water ratio may deliver 0.9 to 1.1 N/mm² at an over-watered ratio — with no visible indication of the difference at installation time.
The second is retempered adhesive — adding water to a mix that has begun to stiffen in the bucket to restore workability. Retempering does not restore the polymer chemistry of the original mix. The polymer has already begun its hydration cycle, and adding water at this stage disrupts the cure chemistry without restoring workability adequately. Retempered adhesive produces a structurally compromised bond that is not detectable at installation.
Cause 6 — No Movement Joints in Large or Outdoor Areas
Tiles and their substrates expand and contract with temperature change. In a large tiled area — a living room floor above 25 sqm, an outdoor terrace, a lobby — the cumulative thermal expansion across the full tile field builds compressive stress between adjacent tiles. Without movement joints to relieve this stress, the accumulated compression expresses itself through the weakest point in the assembly — either cracked tiles, cracked grout, or broken adhesive bonds.
In Indian outdoor environments, this thermal movement is extreme — 35 to 40°C seasonal temperature swings in North India. Outdoor terrace tiles installed without movement joints and without EN 12004 S1 deformable adhesive will delaminate within two to three thermal cycling seasons. The complete breakdown of which tile adhesive classifications are mandatory for Indian outdoor conditions — and why the S1 deformability classification is the difference between an outdoor installation that lasts and one that fails covers the outdoor delamination mechanism in full.
Cause 7 — Water Ingress Behind Tiles
Once water reaches the adhesive bed — through compromised grout lines, through cracked movement joints, through inadequate waterproofing in wet areas — it attacks the adhesive from the bond interface. Non-polymer adhesive absorbs water and softens. The bond strength drops progressively as the adhesive bed remains saturated through monsoon season or continuous bathroom use. What began as a strong bond at installation becomes a weakened bond after three monsoon cycles — and delamination begins at the tile edges and corners where moisture ingress is highest.
Polymer-modified adhesive resists this water absorption through its polymer matrix — maintaining bond integrity under sustained moisture exposure that would degrade non-polymer adhesive progressively.
How Delamination Happens — The Bond Failure Sequence
Stage 1 — Micro-Fracture Formation
Bond failure rarely occurs suddenly. It begins as micro-fractures — invisible fractures at the tile-adhesive or adhesive-substrate interface — caused by the stresses described above. Thermal movement, mechanical load, water absorption, or the initial weakness of a partial coverage bond creates microscopic separation at the weakest points of the adhesive interface. At this stage, the tile sounds perfectly solid to a tap test. No visible indication of failure exists.
Stage 2 — Hollow Section Development
As micro-fractures propagate under repeated loading and thermal cycling, they coalesce into hollow sections — areas where the tile is no longer in contact with the adhesive bed, or where the adhesive has separated from the substrate. The hollow section may begin at a corner or edge and spread gradually toward the tile centre. At this stage, the tap test produces a hollow sound at the affected area. The tile may still appear visually intact.
Stage 3 — Visible Delamination and Tile Lifting
As hollow sections expand, the tile’s structural support becomes inadequate for the mechanical loads it faces. Under foot traffic, the tile flexes across the hollow section — flexing that marble and porcelain cannot accommodate without cracking. The tile cracks at the hollow edge, lifts at corners, or in severe cases rises completely from the floor. At this stage, delamination is visible and requires immediate repair.
Which Tiles Are Most Vulnerable to Delamination in India
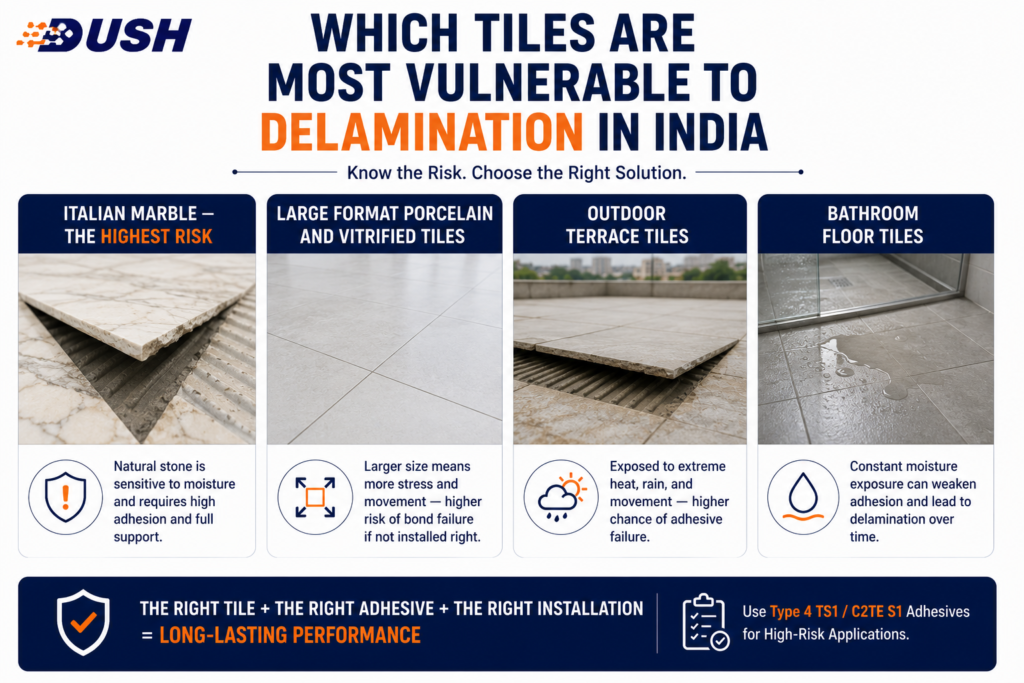
Italian Marble — The Highest Risk
Italian marble — Statuario, Carrara, Calacatta, Emperador — is the highest-risk category for delamination in Indian installations. It is heavy (22 to 28 kg per square metre), brittle at thin sections (18 mm slabs crack at hollow edges), expensive (any delamination requires full tile replacement at significant cost), and typically installed in large formats that require back buttering. The combination of weight, brittleness, cost, and format makes every installation error — wrong adhesive, no back buttering, skinned adhesive — immediately consequential. The complete step-by-step installation method that prevents delamination in Italian marble — from substrate preparation through back buttering to the curing timeline covers every stage where delamination risk can be eliminated.
Large Format Porcelain and Vitrified Tiles
Large format porcelain tiles — 60×60 cm, 90×60 cm, 120×60 cm — are increasingly the standard specification for Indian living rooms, lobbies, and commercial spaces. Their size means that any hollow section concentrates mechanical stress across a large unsupported span. A 120×60 cm tile with 30% hollow coverage has a significant unsupported area that will crack under normal floor loading. Back buttering is non-negotiable for all large format tiles above 60×60 cm, regardless of material.
Outdoor Terrace Tiles
Outdoor terrace tiles installed with indoor adhesive (without EN 12004 S1 deformability) are guaranteed to delaminate within two to five Indian seasonal cycles. The thermal expansion of a 50 sqm terrace tile field between summer peak temperature and winter minimum represents significant compressive force that a non-deformable adhesive bed cannot accommodate. The adhesive cracks under this force, hollow sections develop, and delamination follows within one to two additional seasons.
Bathroom Floor Tiles
Bathroom floor tiles installed with non-polymer adhesive in Indian bathrooms — where daily wet-dry cycling is the norm for decades — progressively lose bond strength as the adhesive absorbs moisture and softens. This delamination is slow and cumulative — the bathroom floor that was sound at year one begins showing hollow sections at year eight and full delamination at year twelve. Polymer-modified adhesive with EN 12004 C2 moisture resistance classification maintains bond integrity through the full service life of a bathroom floor installation.
Substrate Problems That Cause Delamination

Tiling on Immature Concrete
New concrete reaches sufficient compressive strength for foot traffic at 7 days. It does not complete its shrinkage and moisture loss cycle until 28 days. Tiling at 7 or 14 days — common on Indian construction sites under schedule pressure — bonds tiles to a substrate that is still dimensionally changing. As the concrete completes its cure beneath the adhesive, the shrinkage movement creates shear stress at the adhesive-substrate interface. This stress may not immediately cause delamination — but it weakens the bond progressively, producing hollow sections within 12 to 18 months as the concrete completes its cure.
Contaminated or Dusty Substrate
Construction dust on a concrete floor is the most common and most overlooked contamination source. Concrete floors on Indian construction sites accumulate significant dust from plastering, cutting, and general site activity. Tile adhesive applied over this dust layer bonds to the dust — not the concrete. The dust layer is the weakest link and fails under load, taking the adhesive and tile with it. Sweep, vacuum, and damp-wipe the substrate surface before any adhesive application. For high-absorption substrates, apply a primer coat before adhesive to seal the surface and improve adhesion.
Hollow Sections in Existing Substrate
Tiling over an existing screed with hollow sections transfers the hollow into the new tile layer. The hollow beneath the existing screed becomes a hollow beneath the new tile — and the new tile adds load to an already compromised structure. Before tiling over any existing substrate, sound the entire area with a hammer. Any hollow section must be cut out, filled with repair mortar, and allowed to fully cure before adhesive is applied. The full substrate assessment and preparation standard for marble and tile installation — including how to identify hollow sections and the preparation standard required before adhesive application covers the substrate evaluation process in detail.
Uneven or Out-of-Level Substrate
A substrate that deviates more than 3 mm under a 2-metre straight edge creates high spots and low spots beneath the tile layer. High spots cause tiles to rock under load — concentrating stress at two contact points rather than distributing it across the full bond area. Low spots create hollow areas where adhesive contact does not reach the substrate. Both produce delamination initiation points that develop into full bond failure under sustained loading.
Adhesive Selection Errors That Lead to Delamination
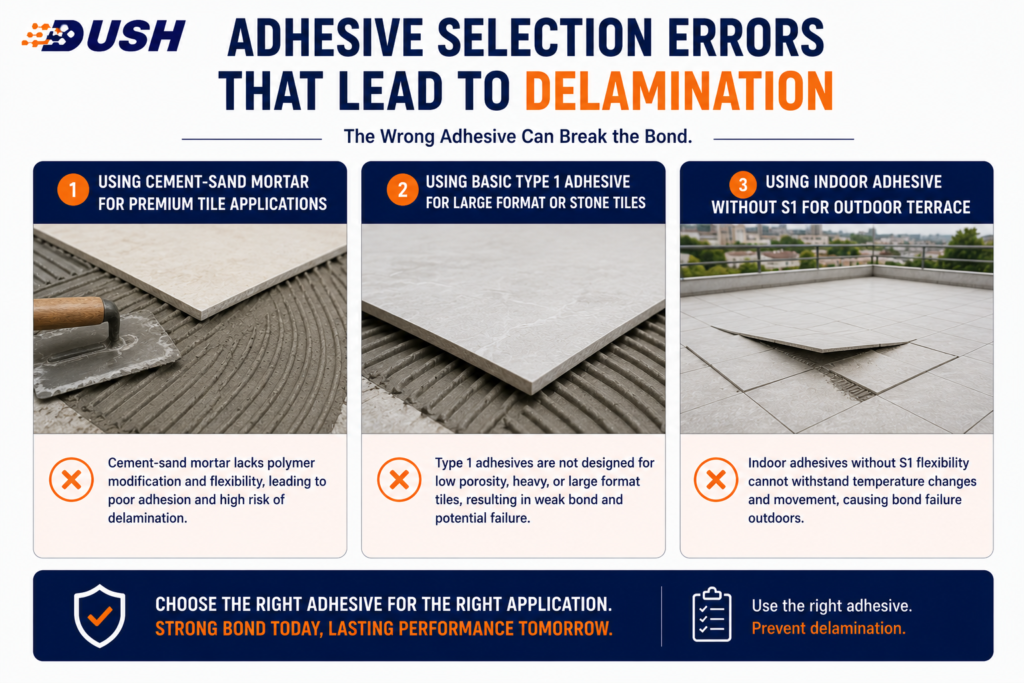
Using Cement-Sand Mortar for Premium Tile Applications
Cement-sand mortar — mixed on site with no polymer content, no classified tensile strength, no anti-sag capability, and no IS 15477:2019 classification — was the Indian standard for tile fixing for decades. It remains widely used on Indian construction sites because it is familiar, inexpensive in raw material cost, and always available. For standard ceramic tiles in simple indoor dry applications fixed in the 1990s, it was adequate. For the large format porcelain, Italian marble, outdoor terrace, and wet area applications that define modern Indian residential and commercial construction, it is categorically inadequate — and the delamination it produces is predictable, not exceptional.
Using Basic Type 1 Adhesive for Large Format or Stone Tiles
Basic Type 1 cementitious adhesive — available widely in the Indian market at a lower price point than Type 4 TS1 — is not suitable for marble, stone, large format tiles, wall applications, wet areas, or outdoor use. Using it for these applications produces delamination through the same mechanism as cement mortar: insufficient tensile strength, no open time for large format positioning, no water resistance for wet area bond integrity, no flexibility for thermal cycling.
Using Indoor Adhesive Without S1 for Outdoor Terrace
Indoor polymer-modified adhesive — even correctly classified IS 15477:2019 Type 4 TS1 — without EN 12004 S1 deformability will produce delamination on outdoor Indian terraces. The absence of S1 means the adhesive bed is rigid. Indian outdoor thermal cycling across 35 to 40°C seasonal swings generates compressive forces in the tile field that rigid adhesive cannot absorb. The adhesive cracks, hollow sections develop, and delamination follows within two to three seasonal cycles. Outdoor terrace tile adhesive must carry EN 12004 S1.
How to Diagnose Tile Delamination
The Tap Test
The tap test is the definitive on-site method for identifying delaminated tiles. Using a coin, the handle of a screwdriver, or the knuckle, tap systematically across the tile surface in a grid pattern — centre, four quadrants, and the four edges. A fully bonded tile produces a dense, solid sound. A hollow section produces a clearly distinct dull, resonant sound — often described as hollow or drum-like. The transition between solid and hollow sound is often abrupt and precisely locatable.
Conduct the tap test at regular intervals on existing tile installations — particularly in wet areas and outdoor terraces. Catching hollow sections before they expand prevents the cracking and lifting that requires full tile replacement.
Identifying the Pattern of Hollow Sections
The location and pattern of hollow sections diagnoses the cause of delamination. Hollow sections concentrated at tile corners and edges indicate thermal movement without adequate movement joints — the tiles are pushing against each other at their edges. Hollow sections at the tile centre indicate skinned adhesive placement — the centre of the adhesive bed never bonded because the surface had dried before the tile was placed. Hollow sections scattered randomly across the floor indicate coverage problems — insufficient adhesive application or no back buttering.
When to Re-Fix vs When to Replace
Tiles that are hollow but visually intact can sometimes be re-fixed — if they can be lifted cleanly without cracking. Carefully remove the tile with a wide flat chisel. Remove all old adhesive from both the tile back and the substrate. Inspect the tile back for the adhesive transfer pattern — if the adhesive ridges transferred fully to the tile back (showing high coverage), the delamination was caused by substrate failure rather than coverage failure. Refix with correct Type 4 TS1 adhesive and correct technique. Tiles that crack on removal, tiles with factory-sealed glazed backs incompatible with adhesive re-bonding, and tiles from discontinued ranges where matching replacement is impossible should be carefully preserved and re-fixed with epoxy adhesive for maximum structural performance.
How to Prevent Floor Tile Delamination — The Correct Specification
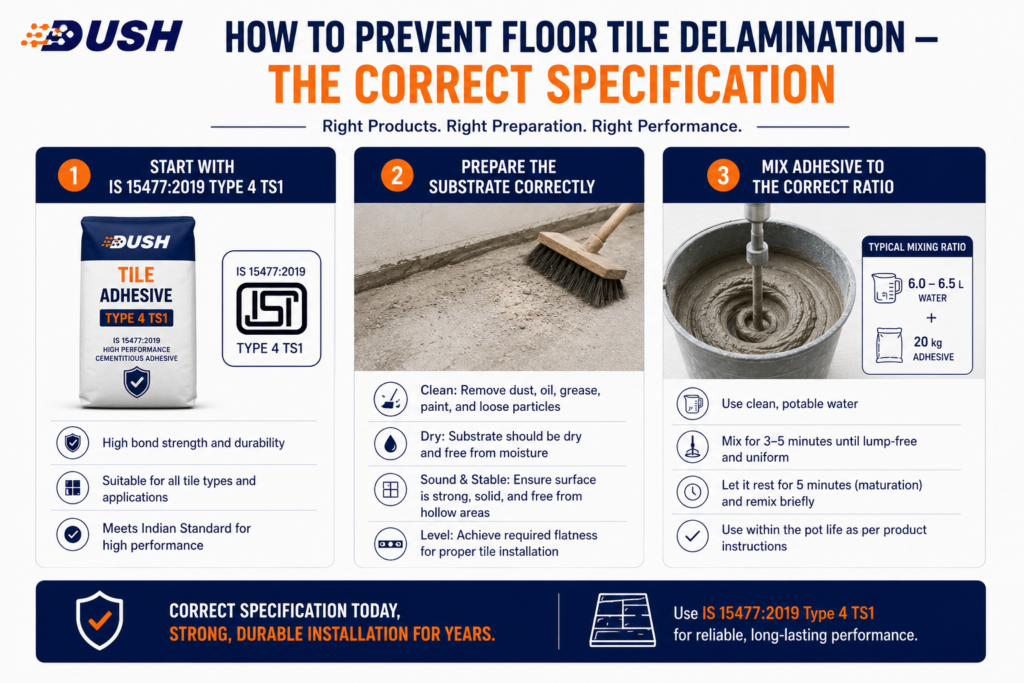
Start with IS 15477:2019 Type 4 TS1
Every tile installation that involves marble, natural stone, large-format tiles (above 60×60 cm), wall applications, wet areas, or outdoor surfaces must use IS 15477:2019 Type 4 TS1 polymer-modified adhesive as the minimum specification. This classification is the threshold below which bond failure — in these applications — is predictable over the installation’s life. How IS 15477:2019 Type 4 TS1 is formally specified for marble and premium tile projects in India — and what the certification means in the context of a professional project specification establishes this classification as the professional baseline, not a premium option.
Prepare the Substrate Correctly
Maximum 3 mm deviation under a 2-metre straight edge. Clean — free of dust, oil, paint, curing compound, and previous adhesive. Dry — no free moisture, no rising damp. Structurally sound — no hollow sections, no delamination in existing substrate layers. Cured — minimum 28 days for new concrete before tiling. Any deviation from these substrate standards should be corrected before adhesive is applied — no adhesive specification compensates for inadequate substrate preparation.
Mix Adhesive to the Correct Ratio
Mix to the exact water ratio specified in the product TDS — 4.5 to 5 litres per 20 kg bag for Dush Apex Limitless. Mix with a low-speed paddle mixer for 2 to 3 minutes. Allow 5-minute slake. Remix briefly. Never add extra water. Never retemper a mix that has begun to stiffen. Discard and mix fresh.
Apply Within the Open Time — Never on Skinned Adhesive
Apply only the area tiled within the open time — 45 minutes for Dush Apex Limitless under standard conditions. Test adhesive before placing each tile: press a thumb firmly onto an adhesive ridge — the ridge must deform easily and transfer adhesive cleanly to the thumb. If the ridge does not deform, the open time has been exceeded. Scrape the area, apply fresh adhesive, and tile immediately.
Back Butter All Tiles Above 60×60 cm
Apply a complete skim coat of Type 4 TS1 adhesive to the tile back face using a flat trowel before pressing onto the substrate. This is mandatory for all tiles above 60×60 cm and for all marble and heavy stone at any format. Back buttering achieves 95 to 100% contact area — the coverage standard that prevents hollow section formation beneath heavy tiles.
Install Movement Joints in Large Areas and Outdoors
Movement joints at maximum 3-metre intervals in all directions for outdoor applications, and at 4 to 5-metre intervals for large indoor floor areas. Fill with weather-resistant silicone sealant — not cement grout. At all perimeter positions (tile field meeting walls, columns, drain edges), fill the joint with silicone. Movement joints are the relief valve for the thermal expansion that adhesive deformability alone cannot absorb across a large tile field.
Dush Apex Limitless — The Adhesive That Prevents Each Delamination Cause
Every delamination cause identified in this guide has a direct preventive specification — and Dush Apex Limitless addresses each one within its classification:
Delamination causeHow Dush Apex Limitless addresses itWrong adhesive — cement mortar or Type 1IS 15477:2019 Type 4 TS1 — polymer-modified, independently tested 1.61 N/mm² tensile bond strengthSkinned adhesive placement45-minute open time (EN 12004 E) — more than double standard adhesive working windowInsufficient coverage — no back butteringCompatible with back buttering technique — same product on substrate and tile back faceWater ingress weakening bondEN 12004 C2 moisture resistance — polymer matrix resists water absorption throughout adhesive layerOutdoor thermal cycling without S1EN 12004 S1 deformability — 2.5 mm lateral movement accommodation for Indian outdoor thermal cyclingHeavy marble and stone load1.61 N/mm² tested tensile strength — rated for marble, granite, and heavy natural stone loadsWall tile anti-sag failureEN 12004 T classification — 0.12 mm maximum slip on vertical surfaceGrey pigment staining of marblePure white formulation — no iron oxide or grey pigments that bleed into marble’s crystal structure
Dush Apex Limitless — manufactured in Italy, certified IS 15477:2019 Type 4 TS1 and EN 12004 C2TE S1 — is the single product specification that addresses every delamination risk factor in one classification.
Frequently Asked Questions — Floor Tile Delamination in India
Why Do My Floor Tiles Sound Hollow?
A hollow sound beneath a floor tile indicates that the tile has lost adhesive contact with the substrate beneath it — either the adhesive never bonded correctly (skinned adhesive, wrong product, contaminated substrate) or the bond has broken down over time (water ingress, thermal cycling without deformable adhesive, or the progressive failure of a coverage-deficient installation). Use the tap test systematically to map the extent of hollow sections. Hollow tiles that are still visually intact can be re-fixed if lifted carefully without cracking.
Can Delaminated Tiles Be Re-Fixed Without Replacing Them?
Yes — if they can be lifted cleanly without cracking. Remove the tile with a wide flat chisel inserted at the joint. Remove all old adhesive from the tile back and the substrate. Inspect both surfaces. Re-fix with IS 15477:2019 Type 4 TS1 polymer-modified adhesive — Dush Apex Limitless — with correct trowel size, back buttering for tiles above 60×60 cm, and placement within the 45-minute open time. Allow 24 hours cure before foot traffic.
How Long Should Tile Adhesive Last Before Delamination Occurs?
IS 15477:2019 Type 4 TS1 polymer-modified tile adhesive — correctly mixed, correctly applied on a properly prepared substrate — should maintain bond integrity for the life of the building: 25 to 30 years and beyond in standard residential applications. Delamination within 5 to 10 years indicates an installation error: wrong adhesive classification, substrate preparation failure, skinned adhesive placement, or inadequate coverage. Delamination within 1 to 3 years indicates a severe installation error — most commonly, the wrong adhesive type for the application or tiles placed on skinned adhesive.
Why Do Outdoor Terrace Tiles Delaminate in Indian Summers?
Outdoor terrace tiles delaminate in Indian summers when the adhesive does not carry EN 12004 S1 deformability. The thermal expansion of the tile field in summer heat builds compressive stress between tiles. Without S1 deformability in the adhesive bed to absorb this movement, and without movement joints to relieve accumulated compressive stress, the adhesive cracks under the force. Each summer-winter cycle adds to the accumulated damage. By the third or fourth summer, widespread hollow sections and tile lifting are the visible result. Dush Apex Limitless carries EN 12004 S1 — the correct outdoor terrace specification for Indian thermal conditions.
Is Cement Mortar or Tile Adhesive More Prone to Delamination?
Cement-sand mortar is significantly more prone to delamination than polymer-modified tile adhesive in all applications beyond simple dry indoor ceramic. In wet areas, cement mortar absorbs water and weakens progressively — polymer-modified adhesive resists water absorption through its polymer matrix. In outdoor environments, cement mortar has no flexibility and cracks under thermal cycling — polymer-modified adhesive with S1 deformability accommodates movement. For marble and heavy stone, cement mortar provides insufficient tensile strength for the sustained gravitational and mechanical loads — polymer-modified Type 4 TS1 adhesive delivers independently tested bond strength rated for heavy tiles across decades of use.
Why Did My New Tiles Delaminate So Quickly?
Rapid delamination — within weeks or months of installation — almost always indicates one of three causes: tiles were placed on skinned adhesive (the adhesive had dried before tiles were placed, producing no actual bond); the substrate was contaminated and the adhesive bonded to the contaminant rather than the concrete; or the concrete substrate was less than 28 days old and continued shrinkage broke the bond before it could develop strength. All three are installation errors correctable with the right specification and technique. Examine the back of the delaminated tile — if clean adhesive ridges transferred fully to the tile back, the adhesive worked correctly but the substrate failed. If the tile back is clean with no adhesive transfer, the tile was placed on skinned adhesive.